

Do you struggle to find important files on your device because they are buried under layers of duplicates?
Duplicating photos and files can be a significant source of frustration for many people, causing clutter and wasting valuable storage space on their devices. It can slow down your device and make finding the files you want to keep difficult. So, many people may wonder how to delete duplicate photos on Mac with ease. Don’t worry, there are solutions to this problem!
This article will explore different methods for deleting duplicate photos on Mac, including manual methods and software options. By the end of this article, you will clearly understand how to easily remove duplicate photos on Mac, giving you more space and a more enjoyable digital experience.
So let’s get started!
Part 1: Why are there duplicate photos on my Mac?
Duplicate photos can be created in many situations, and they can cause frustration and clutter on your Mac. Here are some common reasons why duplicate photos may exist on your Mac:

- Importing photos from mobile phones and cameras: When you import photos from your mobile phone or camera to your Mac, it is possible to accidentally create duplicates of the same image.
- Accidentally copying a picture: It is common to copy a picture while trying to move or delete it, resulting in a duplicate.
- Saving the same image multiple times: Sometimes, we may save the same image multiple times, either intentionally or unintentionally, resulting in multiple duplicates.
No matter the reason, duplicate photos take up valuable space on your Mac, and it is recommended that you delete them to free up storage space.
So, how can you do it? Read on for the next steps to learn how to easily delete duplicate photos from your Mac!
Part 2: Using duplicate photos Finder on Mac
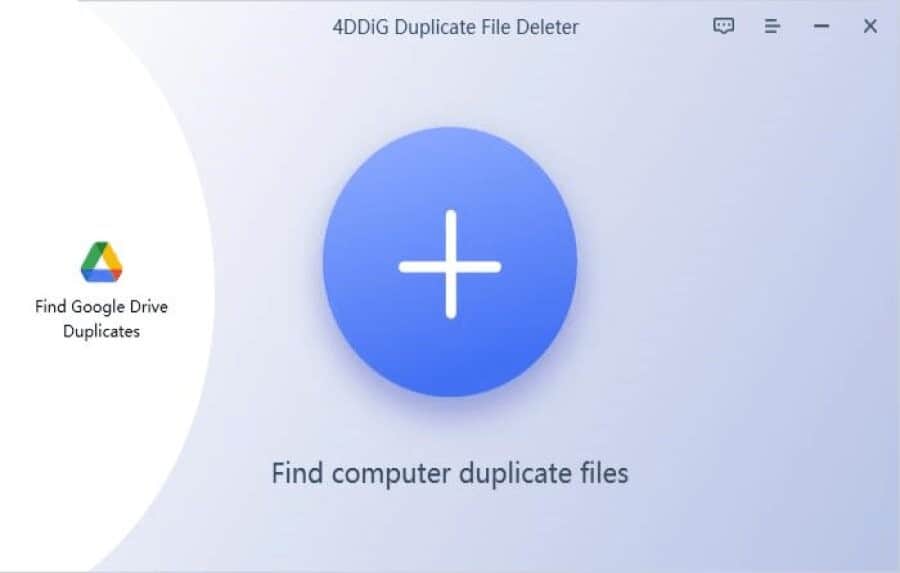
4DDiG Duplicate File Deleter, a powerful software, lets you quickly and easily locate duplicate files and images on various storage devices like Mac or WindowsPC.
The software boasts 100% accuracy, ensuring that no duplicates are missed. One of the best features of 4DDiG Duplicate File Deleter is the ability to preview and select which duplicate files you want to delete, allowing for easy customization and file management.
So, here are the easy steps to follow with 4DDiG Duplicate File Deleter:
Step 1: Choose a Path
First, click to add a folder you want to scan for duplicates. This could be on your computer, external hard drive, USB, or Google Drive.

Step 2: Scan for Duplicates
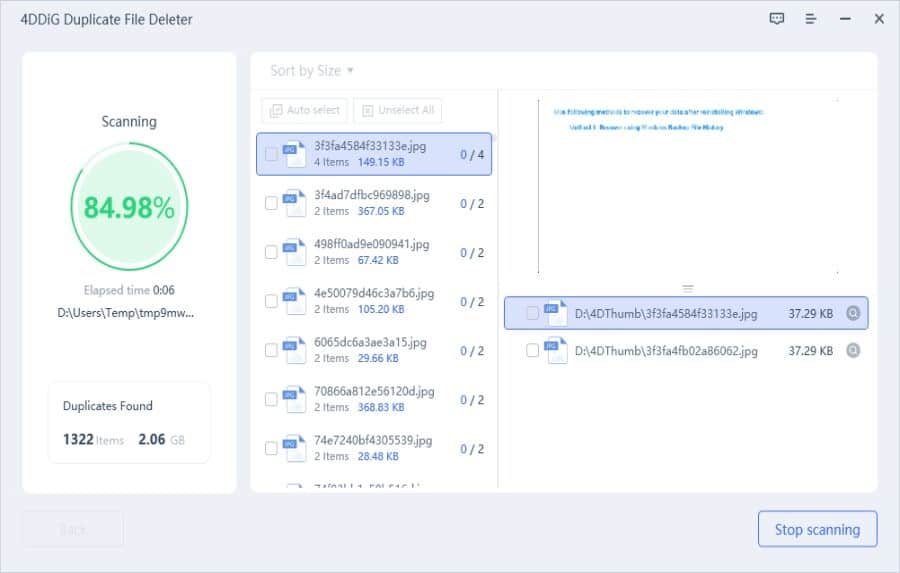
Next, set the scan mode to your preference and let the software do the work. It will scan the selected folder and search for duplicate files, ensuring 100% accuracy.
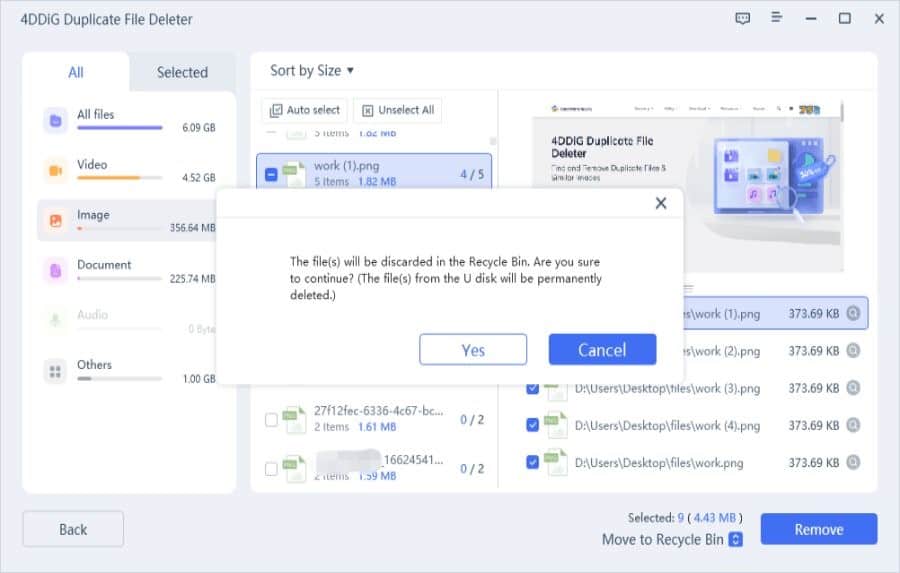
Step 3: Remove Duplicate Files
After the scan is complete, all the files will be listed for preview. You can easily select the duplicates you want to remove, and with just one click, you’ll free up valuable disk space and boost your device’s performance.
4DDiG Duplicate File Deleter offers a special offer to remove 15 duplicate files for free, allowing you to try the software and see the benefits for yourself.
So why wait? Say goodbye to the headache of manually deleting duplicates and hello to the efficient and effective 4DDiG Duplicate File Deleter solution.
Part 3: How to delete duplicate photos on Mac manually
Delete Duplicate Photos Mac Through the Finder App
Don’t want to use software and want to manually get rid of duplicate photos on your Mac? No problem! You can use the Finder app to access all files on your Mac, including duplicate photos.
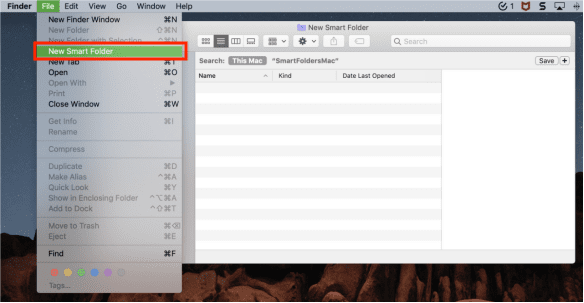
Step 1. Open Finder and click “New Smart Folder” under the “File” tab.

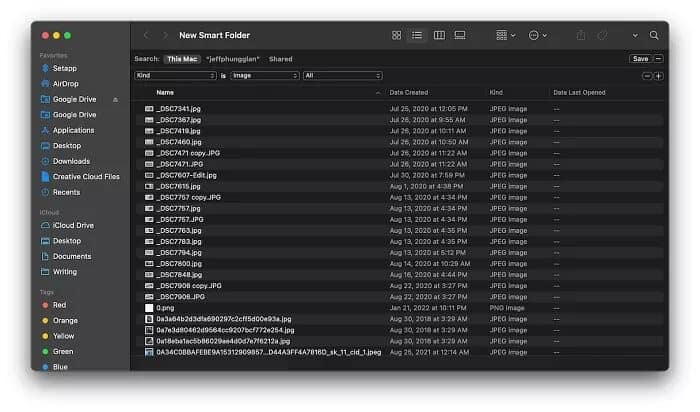
Step 2. Click the plus + icon and select “Kind” and “Image” from the dropdown menus.
Step 3. Duplicate photos will be displayed, select them by control-clicking on the blank space next to them.
Step 4. Right-click and choose “Move to Trash.”

With these easy steps, you can easily locate and delete duplicate photos on your Mac without using any software. So, give it a try and declutter your photo collection today!
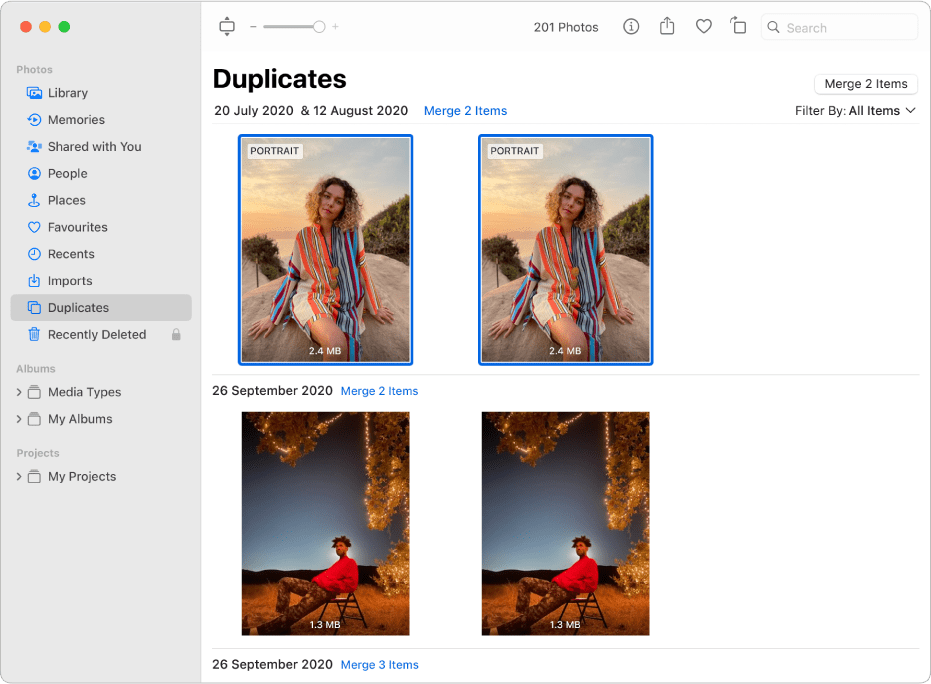
Delete Duplicate Photos Mac Through the Photos App
Are you curious about the new macOS Ventura beta release? If you’re still on the fence about upgrading, let us tell you that it comes with many cool new features and improvements!
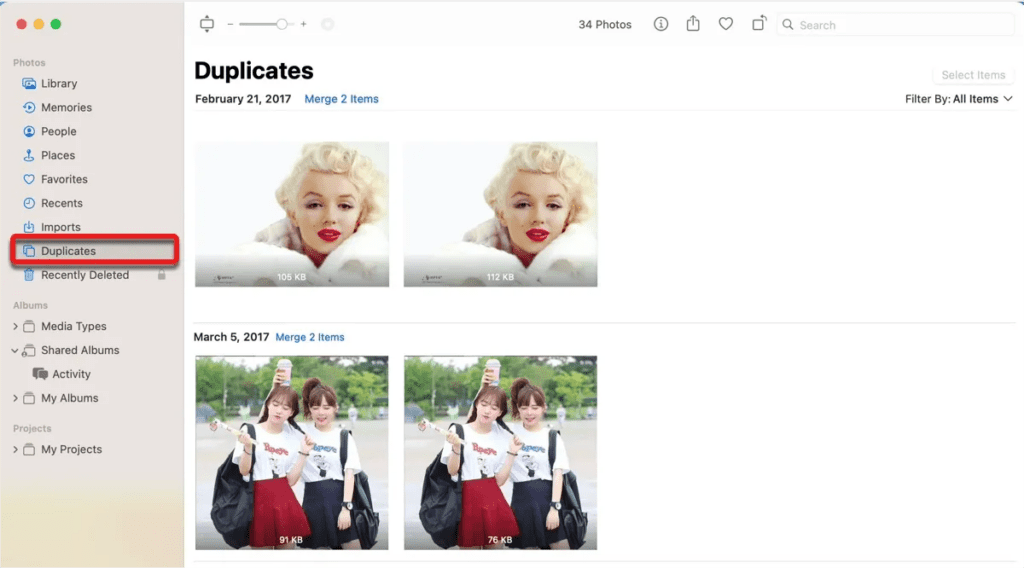
One of them is the automatic sorting of identical photos into the Photos Duplicates folder, which saves you time and effort in dealing with identical pictures.
If you’ve already upgraded and want to remove duplicate photos, simply follow these steps:
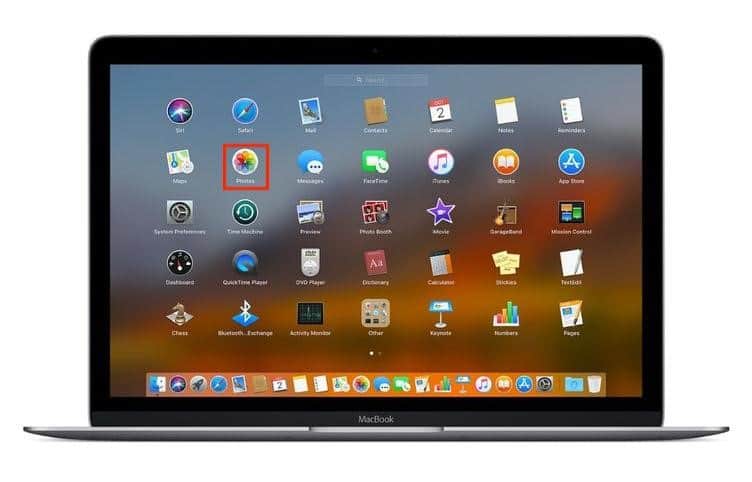
Step 1: Open the Photos app on your Mac running macOS 13.
Step 2: Look for the Duplicates folder on the left sidebar of the Photos app

Step 3: Hold down the Command key and drag your mouse to select the pictures you want to remove. If you want to see more pictures, press the Command + Minus keys on your keyboard.

Step 4: Right-click the selected photos, and then scroll down to the Delete X Photos option.
Step 5:When you delete duplicate photos, you can see them in the ‘Recently Deleted’.If you click “delete all” in the upper right corner, You will never be bothered by duplicate photos again.


The Photos app covers you with its new merge duplicate function in macOS Ventura. This function will keep the highest quality photo and delete the rest of the duplicates, so you don’t have to spend any time sorting through them yourself.
Upgrading to macOS Ventura will make your photo management a lot easier!
Part 4: Tips for duplicate photos on Mac
Do you remember that amazing trip you took a while ago, snapping photos of your adventures? Well, have you checked your photo library lately? Are you drowning in a sea of duplicate photographs? Don’t panic!
We all love to capture memories, but protection is always better than precautions, and we’ve got some tips to help you avoid future photo duplications.
- First, make sure all your devices are connected to the same account using the same Apple ID. Multiple IDs or the wrong one logged in can result in images not syncing correctly, leading to duplicate photos.
- Next, when importing photos from a camera other than your iPhone, only do it once and ensure that you remove any duplicates from your SD card before importing. This will help you avoid the headache of deleting duplicates later on.
- But the best thing you can do is to clean up your photos as soon as possible. If you’ve just come back from a trip or taken many photos at an event, sit down and weed out any duplicates while the memories are still fresh in your mind. Trust us; it’s much less daunting than going through thousands of photos months later.
With these simple tips, you can protect your photo library from future duplications and keep it looking sleek and organized. Happy snapping!
Conclusion
Having duplicate photos on your Mac can be frustrating and time-consuming to deal with, Don’t worry, there’s an easy solution! We’ve provided some helpful tips for removing duplicate photos, but if you want to make the process even more efficient, a reliable duplicate photos finder on Mac like 4DDiG DFD is the way to go.With its advanced algorithms and user-friendly interface, 4DDiG DFD can quickly scan your photo library and identify duplicates. You can then delete them all at once or select which ones to keep.
But prevention is key! We’ve also shared some useful tips to help you avoid ending up with duplicate photos in the future. By following these tips and using 4DDiG DFD, you can keep your photo library organized and duplicated-free.
So don’t let duplicate photos clutter your Mac and waste your time!
Duplicate photos Mac FAQs
Q: How do I get rid of duplicate photos on my Mac?
Ans: As previous stated, to get rid of duplicate photos on your Mac, you have three common options:
Use duplicate photos finder on mac: The duplicate photos finder on mac like 4DDiG DFD quickly detects and previews duplicates, allowing you to delete them in just a few clicks.
Use Finder: Manually search for duplicates using Finder’s search function. Select the folder or drive, create a new smart folder, and sort by “Kind” and “Image” to group duplicates.
Use Photos App: Access the “Duplicates” album under “Utilities” to use the built-in duplicate detection feature. You can merge or delete duplicates as needed.
Q: How do I find duplicate photos in Apple Photos?
Ans: The app provides a convenient solution if you’re looking to find and remove duplicate photos in your Apple Photos library. The Photos app automatically identifies duplicate photos and videos and places them in a separate ” Duplicates ” album within the “Utilities” section.
- To access the Duplicates album, open the Photos app, tap “Albums,” and scroll down to “Utilities.” If there are any duplicate photos or videos in your library, they will appear side by side in the Duplicates album.
- To merge the duplicate items, tap on “Merge” and then select “Merge [number] Items.”
- The app will automatically combine the highest-quality version of the duplicate photos or videos and all relevant data into a single item.
Q: What is the best photo duplicate finder for Mac?
Ans: Although there are various duplicate photo finders to remove duplicates on Mac, you can try using 4DDiG Duplicate File Deleter. Why? Not only can it find duplicate photos quickly and with 100% accuracy, but it can also preview and remove duplicates from different storage devices in seconds.