

Data loss is a common problem faced by many people around the world. It’s one of the most basic issues that occur in many situations including both device hardware and software issues. Luckily, if you know why you lost your data or you know enough about data recovery, then it’s easier for you to understand the situation well and take proper measures. Retrieving all your lost data is not a rocket science. In that sense, we have assembled the best data recovery ways for you to follow as a step by step guideline in this article. Hope it helps you to get back all the lost data in no time.
Part 1: Some General Situations of Data Loss
There are many general situations or reasons behind data loss. Sometimes a data loss situation can be so severe that data recovery becomes impossible. So you need to make sure that you know all the common situations to avoid them as much as you can.
- Accidental deletion can be the most common situation for data loss.
- Technical damage inside hard drive can be a reason for data loss.
- Sudden power failure is a common situation for data loss.
- Any kind of water type beverages can cause both hardware & software issues and eventually cause data loss.
- Any kind of virus or malware attack can cause data loss.
- Computer theft can be another general situation for data loss.
- Any kind of natural disaster can create data loss situation.
- Sometimes software corruption can cause data loss to your device.
- Accidental format can be another general data loss reason.
- Hackers can cause data loss.
Part 2: Possible DIY Ways to Recover Lost Data
You should remember one thing that DIY data recovery is not recommended by us at all if you are not an expert and you don’t know what you are doing. Sometimes, DIY recovery attempts may result in worsening the damage, and often results in the data being unrecoverable. So if you want an effective working solution, then commercial file recovery software tools may help you out. Follow the part 3 of this article to understand more about it. There are various possible DIY ways to recover lost data. Below are some of them for your understanding –
- Using Hex Editor:
You can perform data recovery by using Hex editor in your computer and following some strict steps in order to execute the whole process. In order to perform this, you’ll need the drive where you lost the data, a host PC to perform the data recovery, a Hex editor, another drive to copy the recovered data and the name of the deleted file.
To simply put it, there are 3 steps for doing data recovery using Hex editors –
Step 1: First you need to scan the disk/drive to identify lost/deleted files (or entries).
Step 2: You need to identify the clusters chain for the deleted data of interest.
Step 3: Finally you need to recover the clusters that contain the deleted data.
You need to understand that you can’t recover every single file in this process. If the clusters that contain the deleted files are overwritten, then it’s not possible to recover the data.
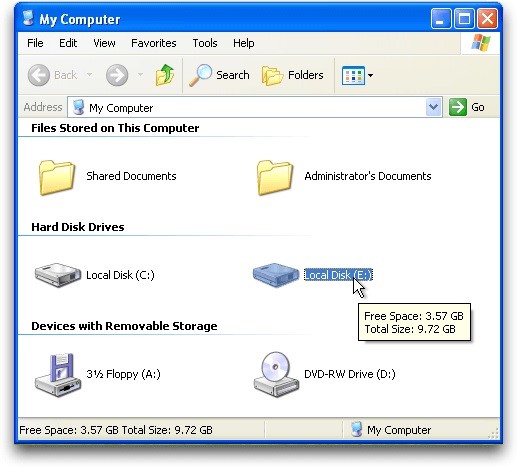
- Checking Hard Disk Sound:
Another way to do data recovery after losing data is by checking if your hard disk is making any unwanted sound inside. To check this, you need to disconnect your hard disk from your computer and connect it with another computer like an external hard drive. Then keep the hard disk close to your ear and try to check if you can hear any kind of sound like clicking, grinding, beeping, scratching, buzzing, whirring etc. Next you need to check if the drive is recognized by your computer and if you can access the drive. If you are able to access the drive, then simply copy all the files from your old drive to another new drive which means you get back all your lost data again. If you are unable to access the drive, or your computer freezes if you try to access that drive, then it means that this drive has become unusable for now. You can try getting professional help for recovering all your data again, if possible.

Part 3: How to recover Lost Data Efficiently – EaseUS (Most Recommended)
If you want to recover data by using the most effective solution, then you should start using EaseUS Data Recovery Wizard. It’s the most efficient and amazing data recovery software that will allow you to recover data from any data loss situation. When you search for data recovery software free in Google. It’s one of the most recommended one among the kind. It can give you guaranteed data recovery results every time without corrupting or damaging any data from your device. Furthermore, it has some of the most fascinating features that are advanced but easy to use.
Features:
- It can recover data quickly and completely from Windows desktops, laptops, and other Windows – compatible devices.
- It can recover data from more than 100 real life data loss situations including accidental deletion, accidental formatting, virus/malware attack, partition etc. and more.
- It has advanced scan algorithm that can scan all your lost data with 2 different scanning modes.
- Users don’t have to wait till the scanning process is finished, they can instantly start recovering data while the scan is running.
- It allows users to pause, resume or start a data recovery process any time and customize the data recovery schedule.
How to Use EaseUS Data Recovery Wizard:
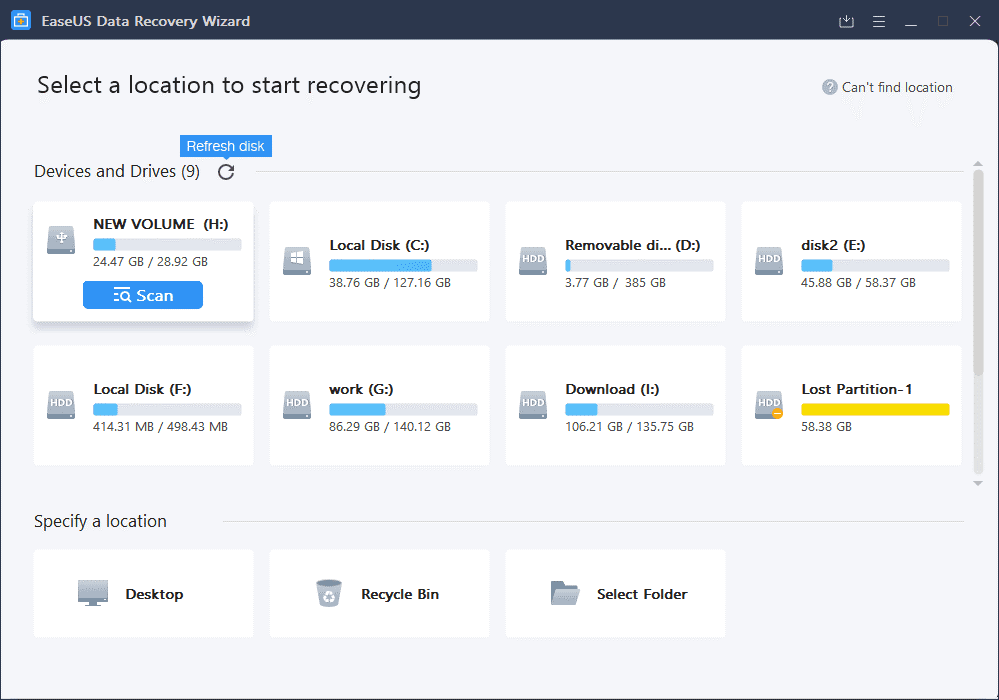
Step 1: Choose and Scan Drive/Folder Location
First you need to download, install and launch the program in your computer. Then you’ll see the homepage of the software and you need to choose the drive/external storage to start scanning for lost data.

Step 2: Scan Selected Drive/Storage
Next you’ll see that the software is performing a quick scan on your selected drive location to find the lost data. When the program has finished the quick scan, you will see that it has listed all the lost data inside the program window. After that, the program will start a deep scanning immediately to make sure no file gets missed. To be precise, this deep scan will definitely bring out all the lost data that can be recovered. Deep scan takes longer time than a quick scan for obvious reasons.

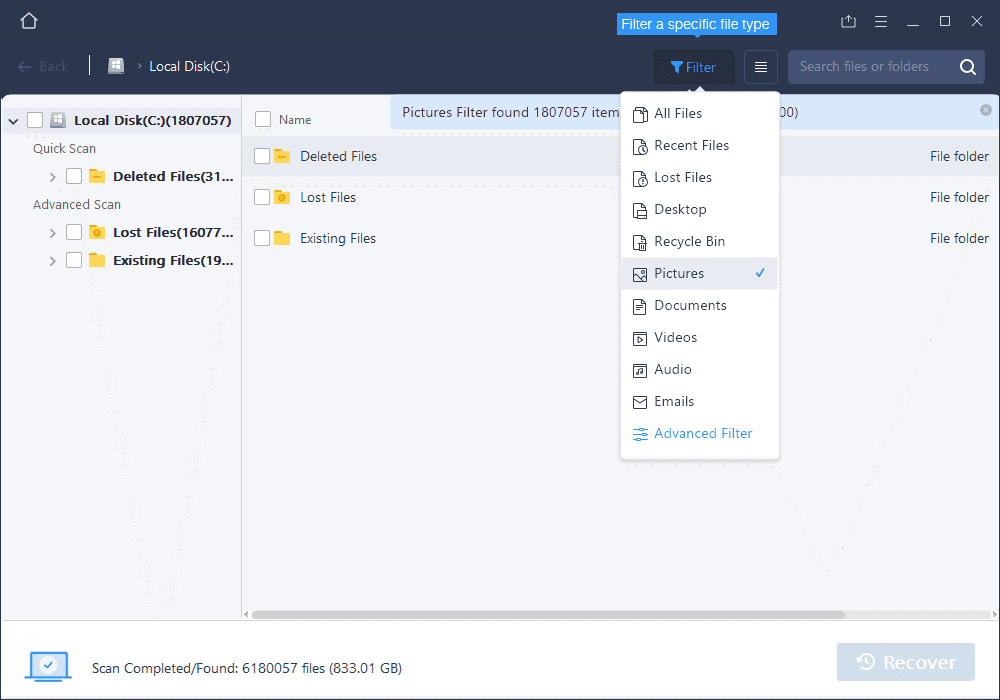
Step 3: Preview and Recover Files
Finally when the scanning is done, you can preview and select all the data files that you want to recover. You can also use the filtering option to filter any desired file types. After you have selected all the files that you need to recover, click on the “Recover” button to start the data recovery process.

Conclusion:
To finish this data recovery guideline, you must make sure that you already know all the details or technical parts about DIY data recovery ways. Otherwise we highly recommend you not to use such methods as you may worsen the situation and the data may get lost forever. So for an easier and better assuring solution, use EaseUS Data Recovery Wizard. It’s the most amazing solution anyone can have for data recovery tasks.