
This article will show install linux on mac. Linux is an open-source os that you can install on your computer free of cost. It supplies a number of advantages over Windows and also Mac, such as flexibility, privacy, much better safety, and easy customization. If you have Mac, as well as you would like to discover a brand-new, open-source OS, take a look at our guide on how to install Linux on a Mac.
If you wish to dual boot Linux and macOS, you will certainly need to produce a room for your Linux OS to live. In order to do this, you will should need to divide your primary hard drive. Right here’s exactly how to do that:
How You Can Install Linux on Mac
In this article, you can know about install linux on mac here are the details below;
How to Partition your Mac Hard Drive
1. Open your Applications folder and click Utilities.
2. After that open Disk Utility.
3. Next off, click View in the top left edge of the home window.
4. Then pick Show All Devices.
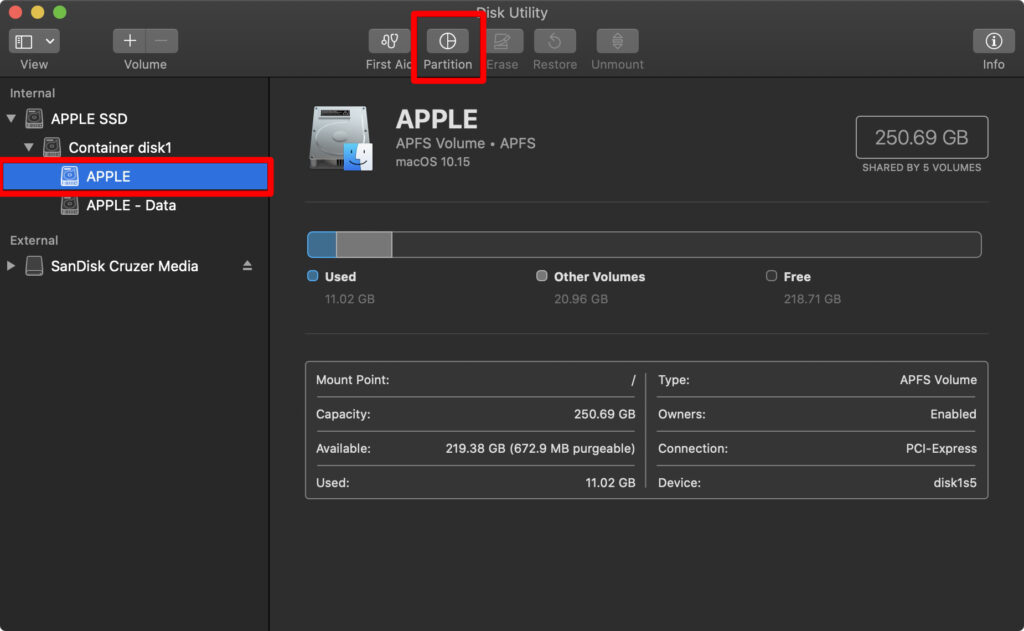
5. Select your macOS dividers and after that click Partition. You will find this button at the top of the home window. If you are utilizing a newer Mac, you may be asked to add a volume. You can click Partition on the pop-up.

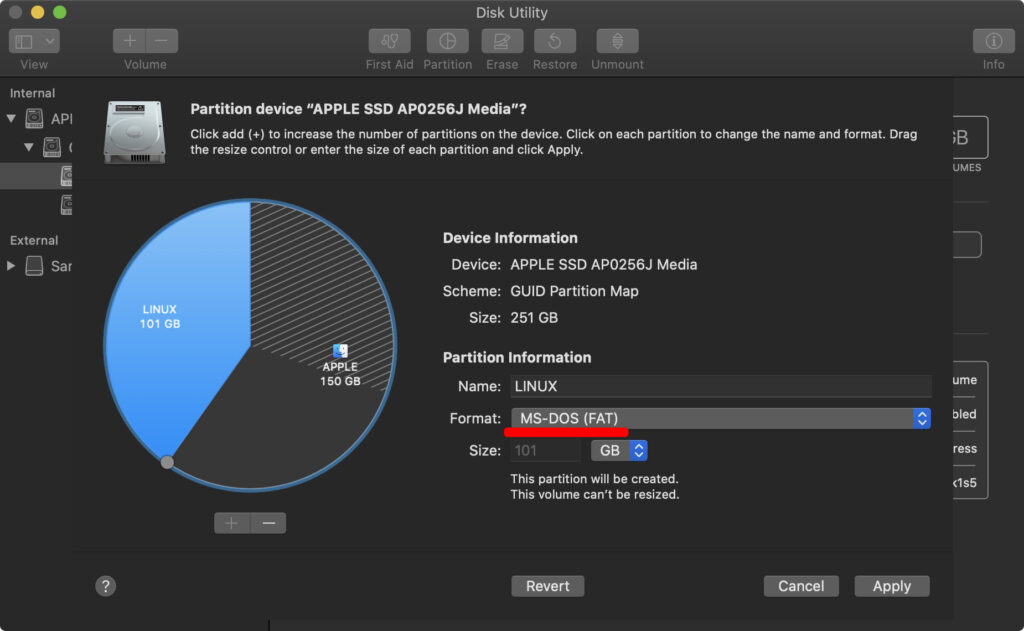
6. Set the partition dimension you need for your Linux OS. You have to do this by dragging the little white circles on the edges of the larger circle, or you can enter the size in package beside Size. The gray sides of the pie will be your Mac area, while the blue area will be your new dividers. It is advised that you sets aside at least 20GB for Linux. You can likewise add other info right here as well, such as the dividing name. Bear in mind of the size of your dividing, you will need this information later.
7. Format the brand-new dividing as MS-DOS (FAT).
8. Click Apply. This will cause your computer system to come to be unresponsive as the dividers is developed.

9. Click Partition and Continue when better triggered and wait for the partition process to end up.
How to Make a Bootable USB on a Mac
1. Download a Linux distro. An ISO file is a disk picture. A few of the top choices are Ubuntu, Mint, or Deepin. They are free to download from each circulation’s main site. In this article, we are utilizing Ubuntu.
2. Open Up Disk Utility, select your USB drive, as well as click Erase.
3. Then formats your USB drive as MS-DOS (FAT) as well as the plan as GUID Partition Map. You can do this in Disk the Utility by selecting your drive and also clicking Erase.


4. Download and install the Etcher app. This will certainly permit you to burn your Linux distro onto a USB flash drive. You can download Etcher for free right here.
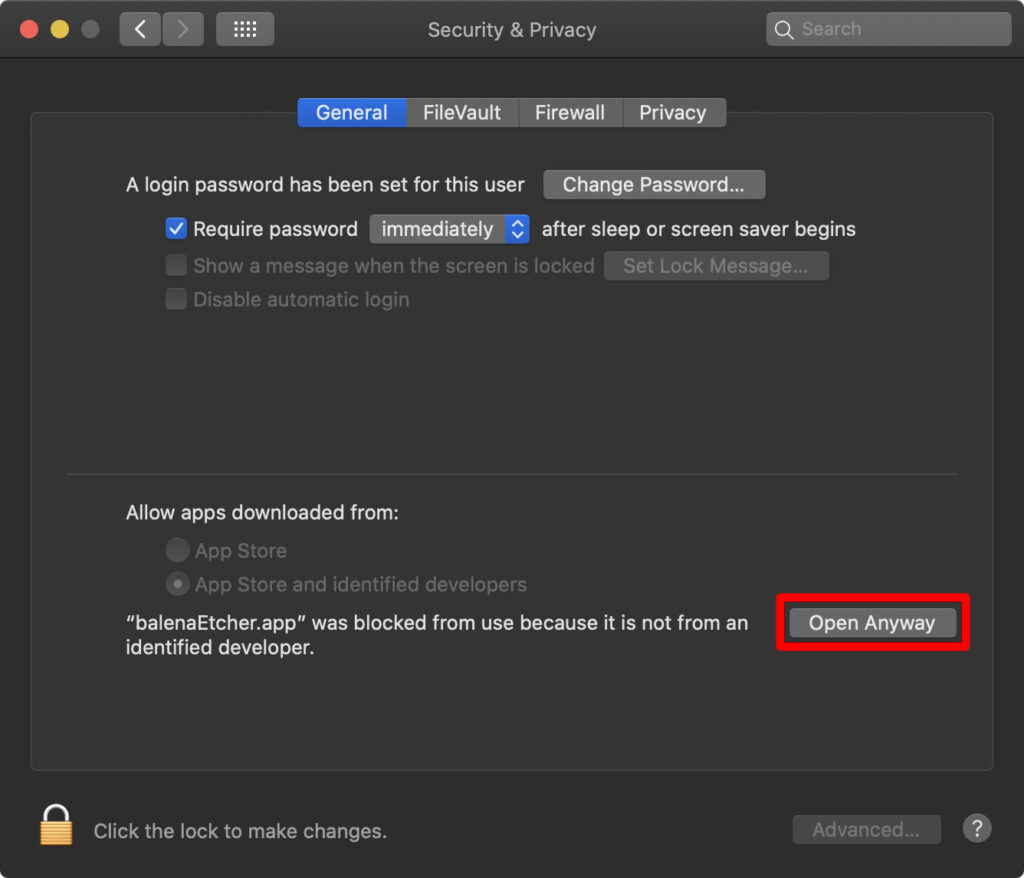
5. Move the Etcher application to your Applications folder. If you obtain a warning saying that you are not able to open up the application, you will need to go to System Preferences > Security and also Privacy > General. Then tabthe lock, enter your password, and also click Open Anyway.

6. Open up Etcher, click Select Image, as well as pick your Linux ISO. This is the documents you downloaded and install symphonious one.
7. Click Select target and select your USB drive.
8. After that click Flash. If you get a mistake message, and you’re running a more recent OS, most likely to Applications > Utilities as well as open the Terminal application. Then get in the complying with command and hit go into:
sudo/ Applications/balenaEtcher. app/Contents/MacOS/ balenaEtcher.
If you still obtain a mistake message that states the disk you placed was not legible, click ignore.
How to Install Linux on a Mac.
When you’ve made a partition, you can after that proceed with the remainder of the Linux installation configuration listed below. But before you start, you will certainly need a USB computer mouse and key-board. This is since Linux will not find your vehicle drivers if you have a newer Mac.
1. Turn off your Mac computer.
2. Connect the bootable Linux USB drive into your Mac.
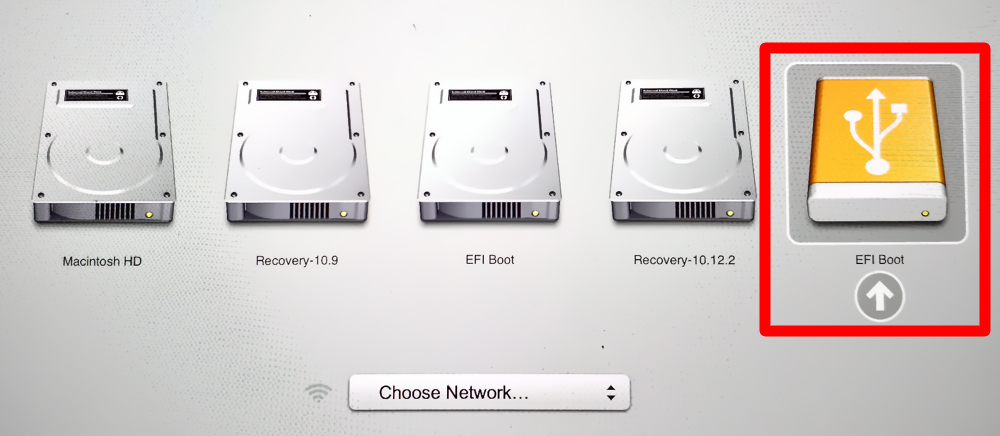
3. Activate your Mac while holding down the Option secret. You will certainly then see the boot manager with a checklist of offered tools you can boot from.
4. Select your USB stick and hit get in. This will be called EFI boot or EFI drive.

5. After that choose Install from the GRUB food selection. You can likewise select Try Without Installing.
6. Comply with the on-screen installation guidelines. Select Normal Installation.
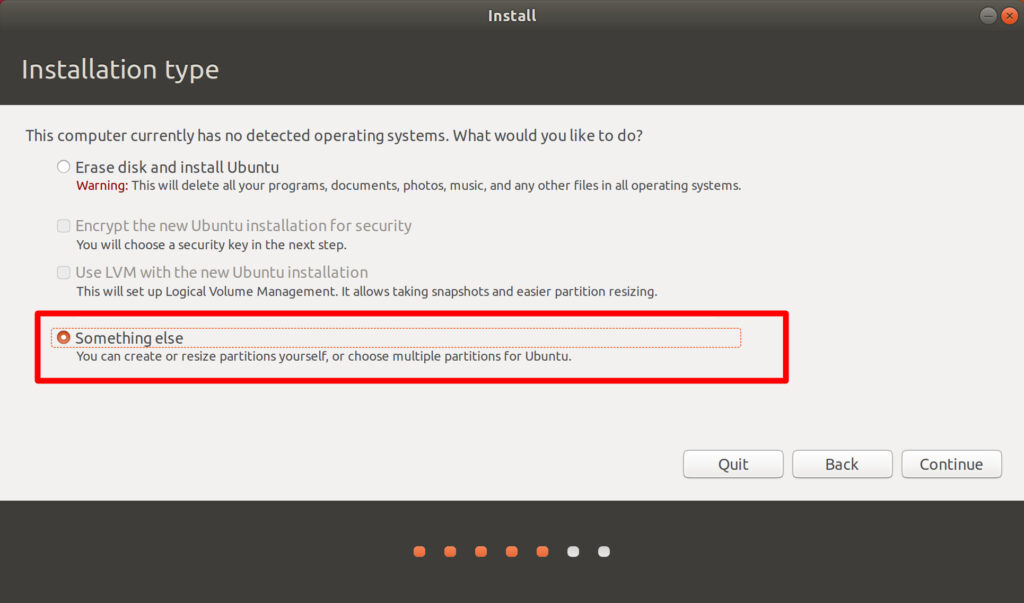
7. On the Installation Type windows, choose Something else. This is an option that will lets you choose the dividers you made earlier for installing your new Linux OS. If you select the other options, you run the risk of setting up Linux over your present os, which would certainly additionally get rid of all your files and folders.

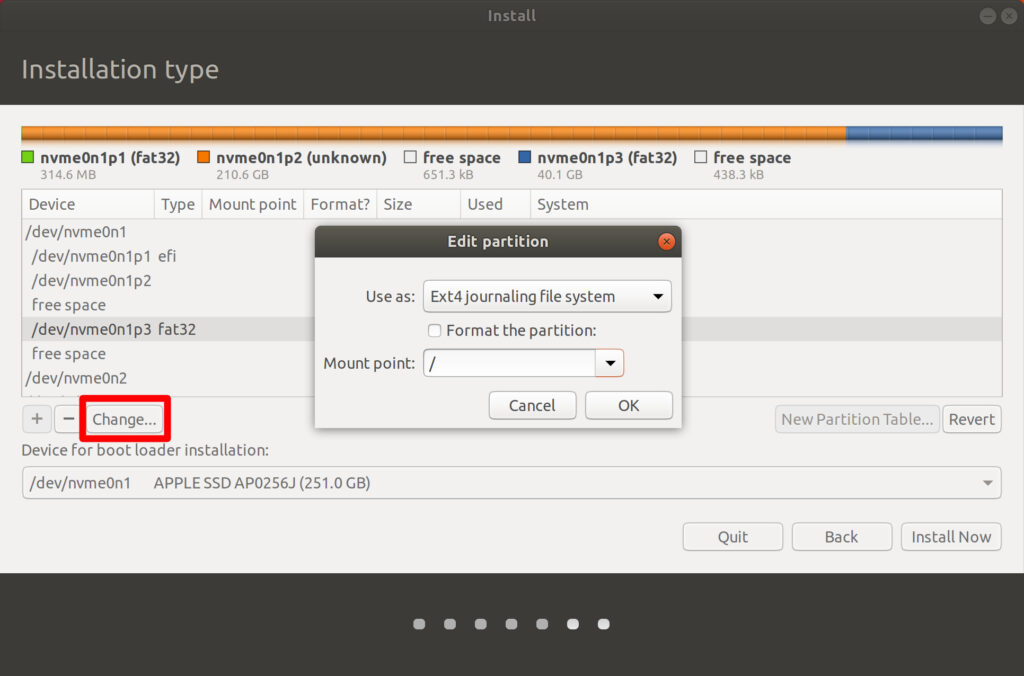
8. Select the partition you made. This is the partition that coincides size as the one that you made previously.
9. Then click Change. You will certainly see this under the listing of tools.
10. In the Use as drop-down, pick ext4 journaling file system.
11. In the Mount Point drop-down, select forward slashs and also click OK.

12. Click Continue when motivated.
13. Then click Install Now.
14. Next, click Continue on prospering alerting pop-ups.
15. Enter your time zone, select your keyboard format, and click Continue.
16. Set up your Linux account. Key in your name, computer name, username, as well as password.
17. Click Continue.
18. Await the setup procedure to begin and complete.
19. Reboot your Mac as well as hold down the Option trick while it does.
20. Select your Linux OS to start using it.
After mounting the OS and exploring it, see to it that your applications are working correctly.