
Your quest to know how to transfer contacts from iPhone to Android and transfer data from Android to Android has led you here. Although an iPhone and an Android belong to different worlds, there are ways you can transfer data from the formal to the latter. You don’t have to see the process as rocket science because it isn’t.
In this content, we’ve got you covered, we’ll disclose the step-by-step solutions to transferring data between iOS and Android devices, including contacts, files, photos and so on. Sit back and enjoy the reading.
Part 1: How to Move Contacts from iPhone to Android
This part reveals some different methods you can use to transfer contacts from iPhone to Android. These include the use of Google Drive, Gmail, vCard, and importantly Dr.Fone – Phone Transfer.
Way 1: Transfer Contacts from iPhone to Android through Google Drive
As a cloud-based storage solution, Google Drive helps save files online and offers users the opportunity to access them on any device (PC, tablet, or smartphone).
Steps
1. Download and launch the app on your iDevice. Then log in with the Google account you’ll be using on your Android.
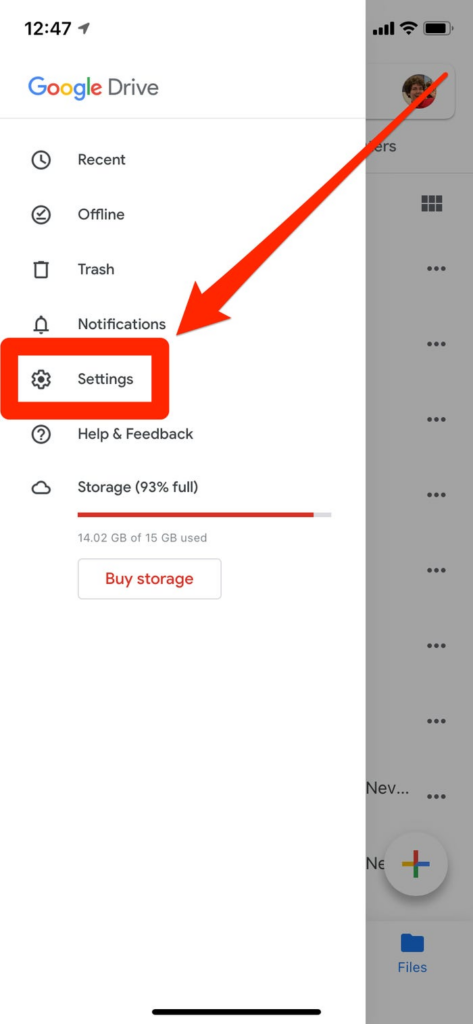
2. Click on the three lines (look at the top-left corner) and tap ” Settings.”

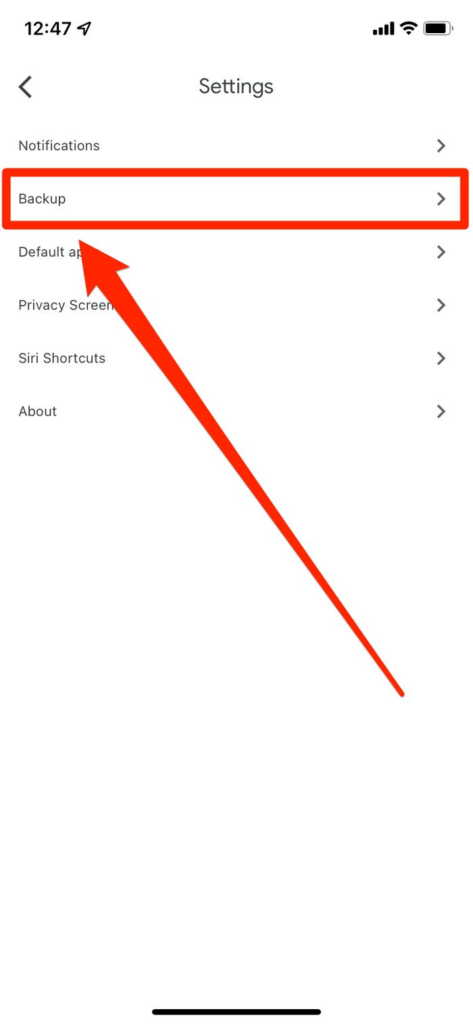
3. Click on ” Backup”
Note: This option may not appear if the data you can share with Google has been restricted by your organization.

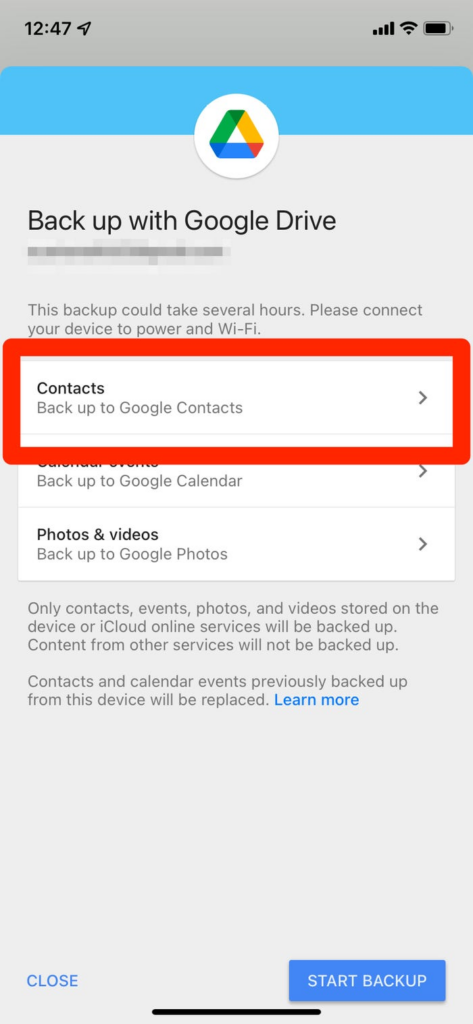
4. On the next page, click on ” Contacts.” Ensure the slider is toggled on and return to click ” Start Backup.” You may need to wait a little while if your contacts are many and if you try to backup photos and calendar events.

5. After a successful backup, sign in to the same Google account on Android to see all your contacts.
Way 2: Move Contacts from iPhone to Android Using Gmail
There are things you need to know about using Gmail. Know that your contacts can be synced with Gmail but only contacts that are linked to the account can be transferred. Also, to transfer your contacts, you’ll need to enable your Gmail account.
Steps
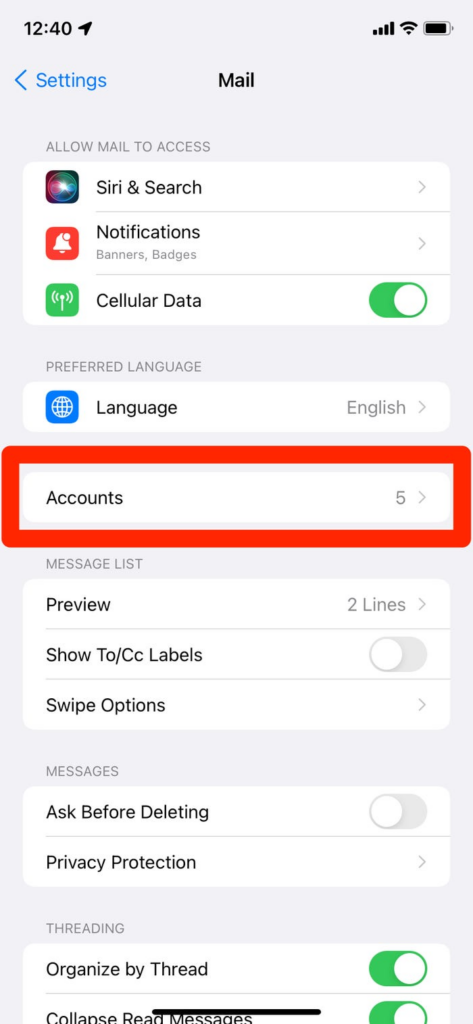
1. Go to “Settings” on your iPhone and click on ” Mail.”
2. Click on “Accounts” and choose the Gmail account to use on Android.

3. On the next page, ensure you see the “Contacts” slider toggled on.
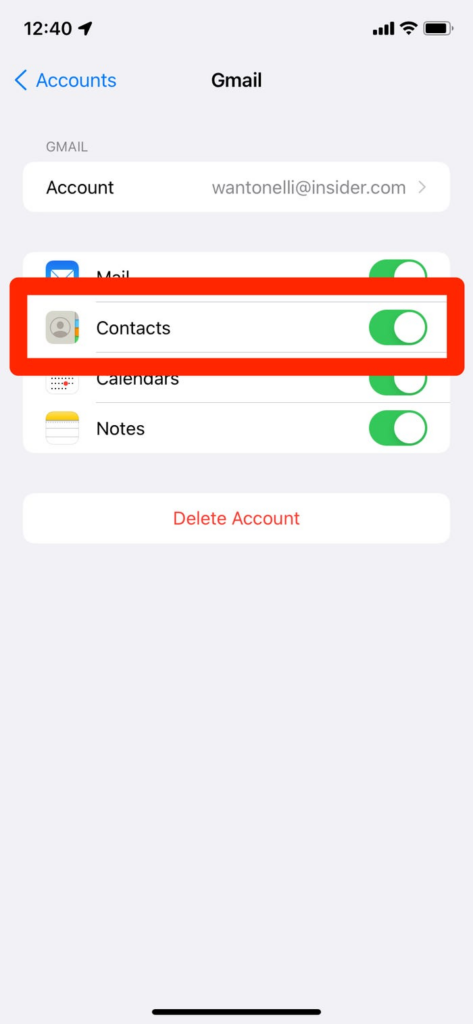

4. Go to your Android device and sign in to the same Gmail account to see your contacts.
Way 3: Transfer contacts from iPhone to Android using a vCard
A vCard or a .VCF file helps hold contact information what makes them ideal for transferring contacts is that they can be read by every mobile device.
Steps
1. Go to “Settings” on your iPhone and click on your name right at the top.
2. Click on iCloud and check the list of apps to ensure the ” Contacts” toggle switch is on


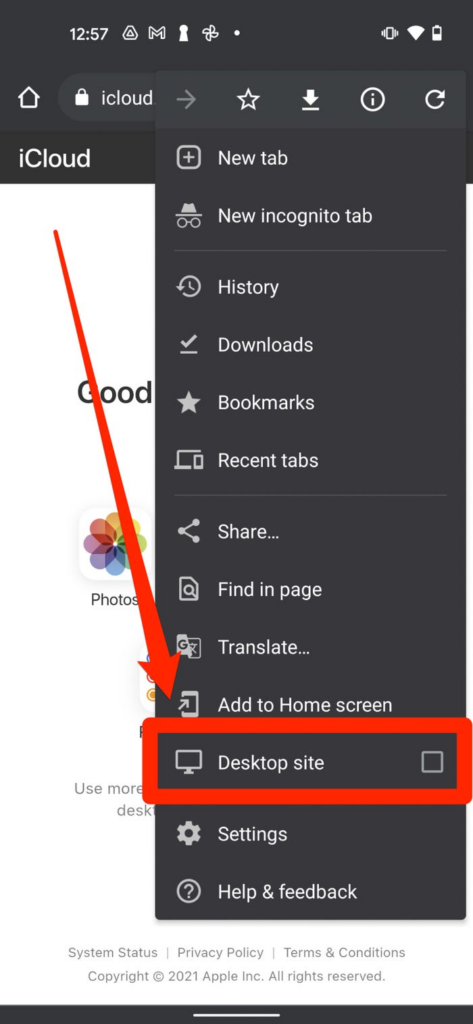
3. Go to iCloud.com on tour Android device and log in to your iCloud account.
4. Then click the three dots you see on Chrome in the top right corner and tap “Desktop site.”

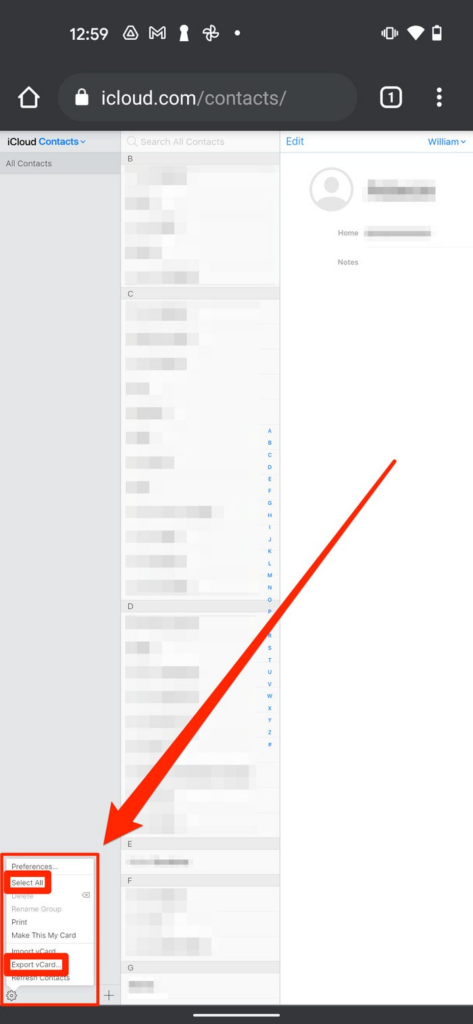
5. Tap on “Contacts” and click on the small gear icon right in the bottom-left corner.
6. Click on “Select All” and ” Export vCard” in the menu.

7. Expect the CF file to download into your device’s files app which may be named My Files, Files by Google, or something close. Then return to open the files app.
8. Click “OK” when asked “Import contacts from vCard?”
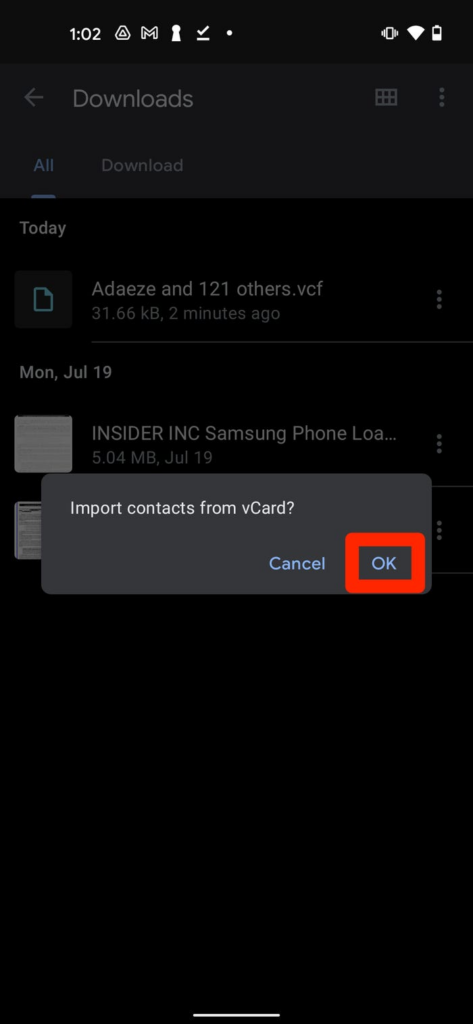

Then watch as your contacts are loaded in.
Way 4: Transfer data from iPhone to Android with Dr.Fone – Phone Transfer
Dr.Fone – Phone Transfer remains the easiest way to transfer contacts from iPhone to Android. As the perfect alternative to other solutions when it comes to ” how to transfer contacts from iPhone to Android, it is highly effective to copy data from iDevice to Android. Note that Dr.Fone – Phone Transfer is compatible with all leading iPhone and Android models and user-friendly.
Steps
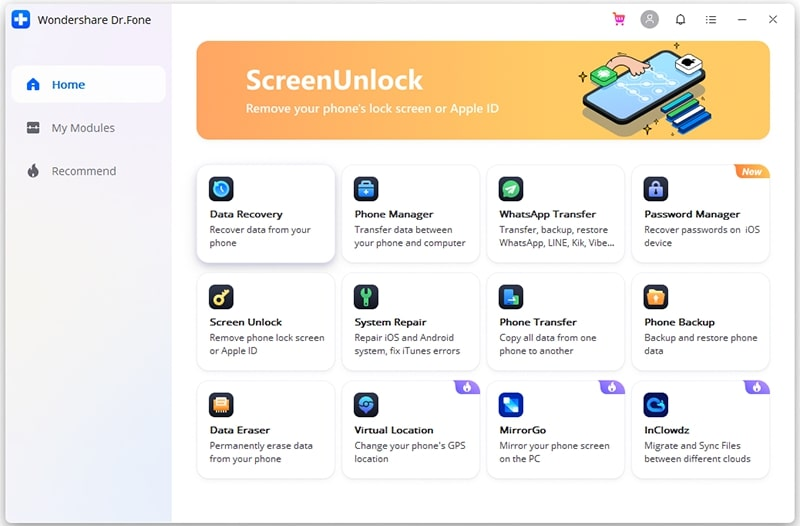
1. Download and launch the software on your PC.
2. Click on ” Phone Transfer” on the welcome screen

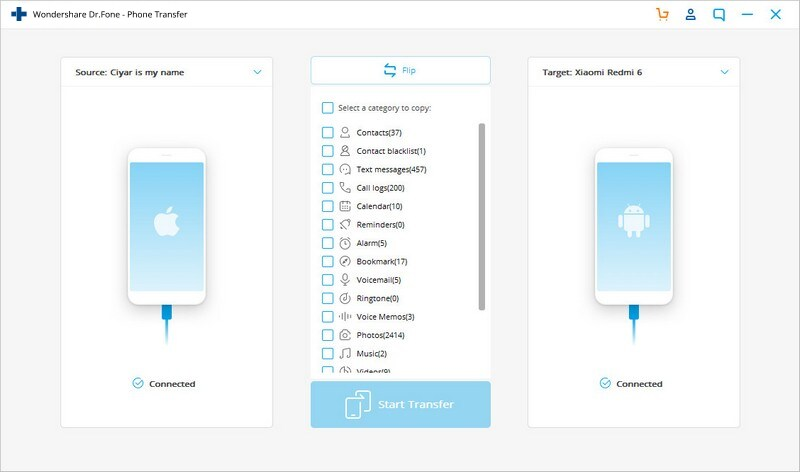
3. Use USB cables to connect your Android and iPhone to the PC and allow them to be automatically detected by it.
Because you’re transferring contacts from iPhone to Android, make iPhone the source and Android the destination device. Use the “Flip” button to change their positions.
4. Choose the “Contacts” category and tap “Start Transfer” to launch the process.

5. Wait for the app to sync your contacts from your iDevice to Android.
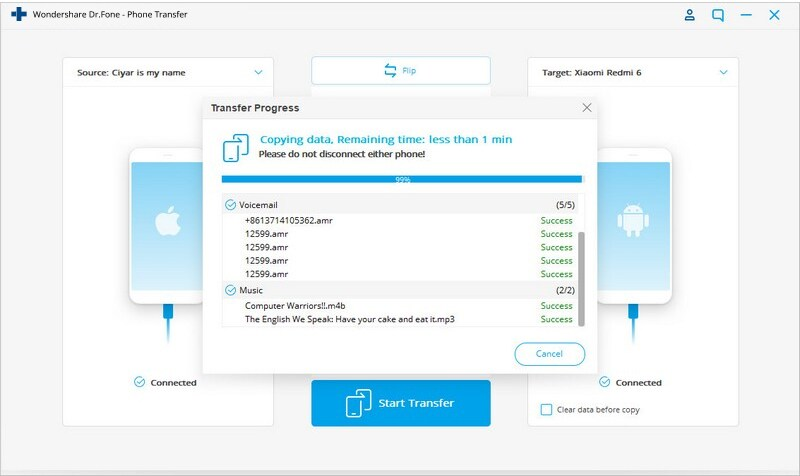

Note: Both devices must not be disconnected until the transferring process is completed.
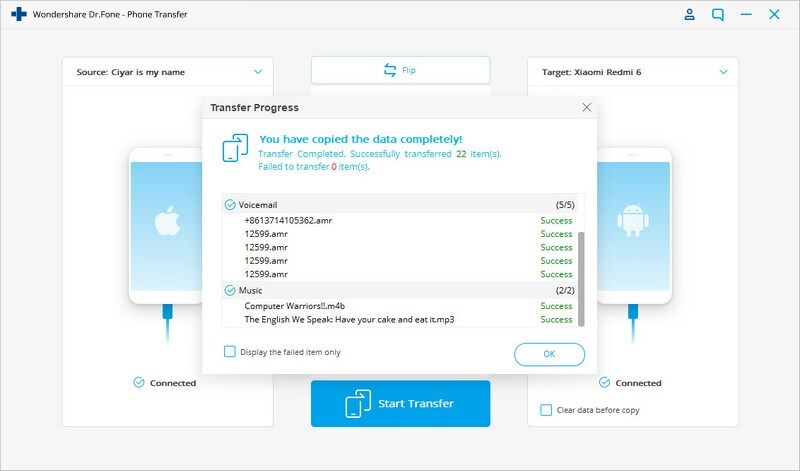
6. After a successful transfer, you will see a popup message. You’re then free to remove safely both devices from your PC.

Part 2: How to Transfer Data from Android to Android
This part reveals some different methods you can use to transfer data from Android to Android. These include the use of Bluetooth, NFC, and importantly Dr.Fone – Phone Transfer.
Way 1: How to Transfer Data from One Android Phone to another Android Using Bluetooth
Bluetooth is one of the common ways to transfer data from one device to another. With it, you can share files such as videos, music, images, or documents wirelessly and easily.
Steps
- Activate the Bluetooth feature on both Android devices and pair them.
- Go to your “File Manager% and select the files to transfer.
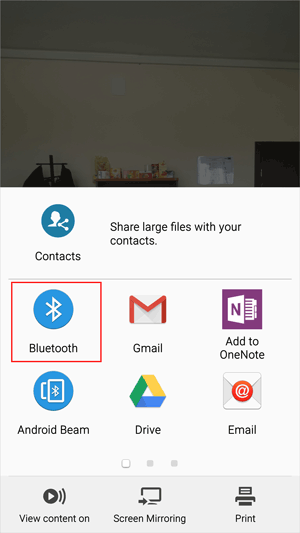
- Click on the ” Share” button.
- Tap on “Bluetooth” from the options that appear
- Choose the other paired device
- File transfer will automatically be activated and both Android devices will show the transfer status.

Way 2: Transfer data from Android to Android through NFC (NEAR-FIELD COMMUNICATION)
NFC (Near-Field Communication) is great when it comes to transferring data from one Android device to another. Unlike the Bluetooth transfer process, it doesn’t require pairing.
Steps
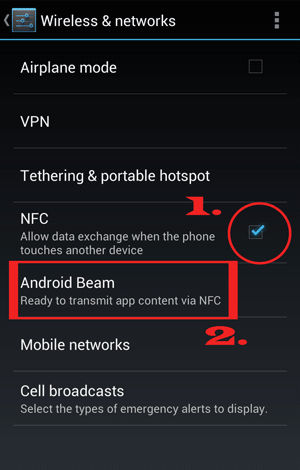
- Get the NFC and Android Beam enabled. To do this, open “Settings” and click on ” Bluetooth and Connections” and tap “NFC” and enable it. You will see “Android Beam” right down, select to turn it on.
- Go to “File Manager” and choose the file to transfer.
- Open the file and place the devices close to each other ( touch the rear panel of one with the other).
- You will get a vibration after which a message will pop up: ” Tap to beam”.
- Then tap to launch the transfer.

Way 2: Transfer Data from Android to Android With Dr.Fone – Phone Transfer
Dr.Fone – Phone Transfer is a great way to transfer data such as contacts, music, messages, photos, chat, calendar, etc. from Android to Android. It is considered the best alternative way because it characterizes a much faster transfer process compared to other transfer tools.
Steps
Download and launch the software on your PC.
1. Click on ” Phone Transfer” on the welcome screen

2. Connect both Android phones with USB cables and ensure they are recognized by showing on both sides of the window.

3. Check the data you wish to transfer from the display of the available and transferable contents. Then tap ” Start Transfer” to send files from one Android to the other.

Conclusion
The aforementioned ways have revealed the possibility of how to transfer contacts from iPhone to Android and transfer data from Android to Android. Since transferring all your data from one phone to another is not so easy, it is recommended that you try Dr.Fone – Phone Transfer, and the reason it is considered the convenient and efficient tool of data transfer.