Fix this site can’t be reached error in Google Chrome. A lot of google chrome users must have faced ‘This website can not be actually connected with error’ yet really did not possess any sort of idea exactly how to fix it? At that point do not fret troubleshooter goes to your disposal to correct this issue easily.
Our company talk about right here specifically some inaccuracies kind like, this site can’t be reached windows 10, this site can’t be reached took too long to respond, this website can not be gotten to make a mistake relationship break and also browsers and reset mistakes. The object of this error is that the DNS look up failed so the page is actually certainly not available.
How To Resolve The Error “this site can’t be reached” In Google Chrome
In this article, you can get the best information about how to resolve this site can’t be reached error here is the details below;


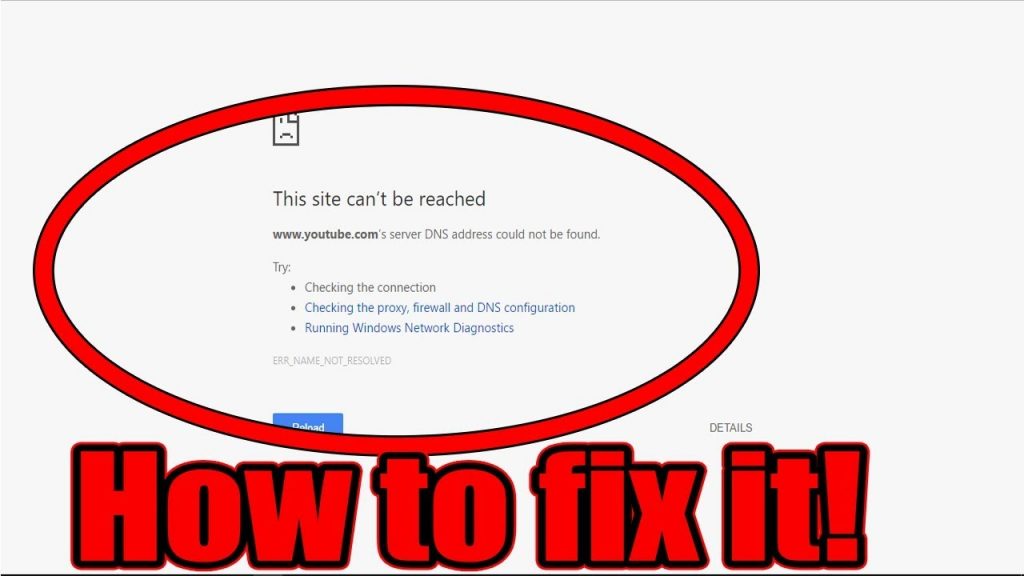
The web server at any kind of internet site can’t be actually located because the DNS lookup failed. DNS is the system company that translates a site’s title to its Web deal with. This error is actually usually dued to having no connection to the World wide web or even a misconfigured system. It can likewise be caused by an unresponsive DNS web server or a firewall program protecting against Google Chrome from accessing the network.
When a DNS hosting server can not convert a domain to an Internet Protocol address in a TCP/IP network at that point there is a DNS failing error. A DNS breakdown develops because of the misconfiguration of DNS address or due to Windows DNS client is not operating. Therefore summarily any time allow’s find Just how to Repair this site can’t be reached error in Google Chrome with the help of the below-listed actions.
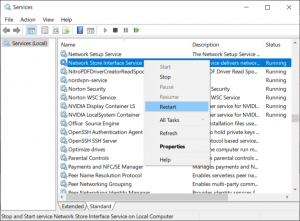
Method 1: Restart DNS client
1. Press Windows Key + R then type “services.msc” and hit enter to open Services window.


2. Scroll down till you find “Network Store Interface Service” (Press N to easily find it).
3. Right-click on Network Store Interface Service and select Restart.

4. Follow the same step for DNS client and DHCP client in the services list.
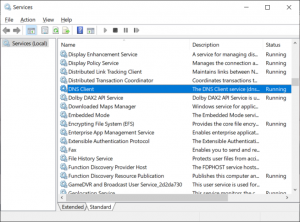

5. Now the DNS client will restart, go and check if you’re able to Fix This this site can’t be reached error in Google Chrome.
Method 2: Change IPv4 DNS Address
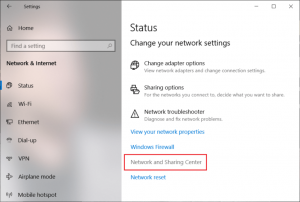
1. Right-click on the WiFi icon on the system tray and then click on “Open Network and Sharing Center.“


2. Now click on “Network and Sharing Center“.

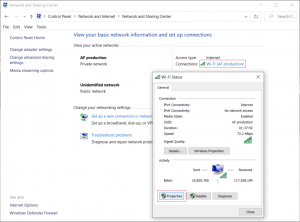
3. Next, click on your current connection in order to open Settings and then click Properties.
Note: If you can’t connect to your network then use Ethernet cable to connect and then follow this step.

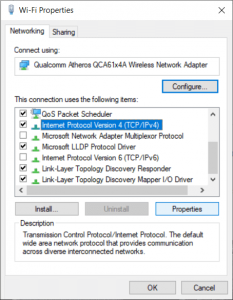
4. On the Wi-Fi Properties window, select “Internet Protocol Version 4 (TCP/IP)” and click Properties.

5. Checkmark on “Use the following DNS server addresses.“
6. Type the following address in the Preferred DNS server and Alternate DNS server:
8.8.8.8
8.8.4.4
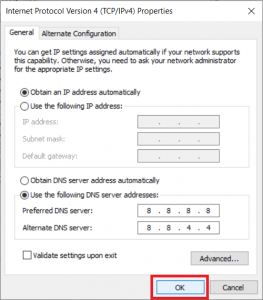

7. Checkmark on “Validate settings upon exit” then click OK and click Close.
8. This step may be able to fix this site can’t be reached error in Google Chrome.
Method 3: Reset TCP/IP
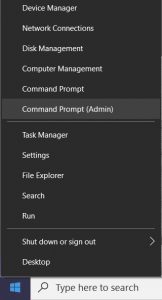
1. Right-click on Windows Button and select “Command Prompt(Admin).“
Note: If you don’t see Command Prompt (Admin) then you use this guide to open Command Prompt with administrative privileges.

2. Now type the following command one by one and press Enter after each one:
ipconfig /release
config /all
ipconfig /flushdns
config /renew
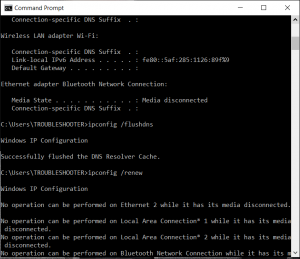

3. If the above commands didn’t fix the issue then type the following commands one by one and hit Enter:
netsh int ip set dns
netsh winsock reset
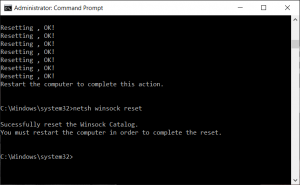

4. Reboot to save changes.
Method 4: Disable Proxy
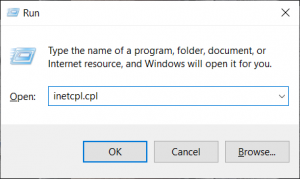
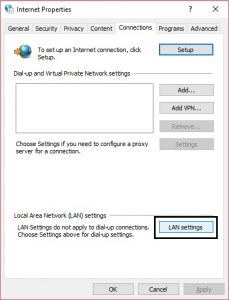
1. Press Windows Key + R then type “inetcpl.cpl” and hit enter to open Internet Properties.

2. Next, switch to the Connections tab and click on the LAN settings button.

3. Uncheck “Use a Proxy Server for your LAN” and make sure “Automatically detect settings” is checked.
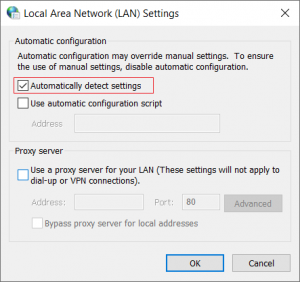

4. Click Apply followed by OK and reboot your PC.
If you’re unable to change proxy settings then perform the following steps to fix the issue.
Method 5: Run Network Troubleshooter
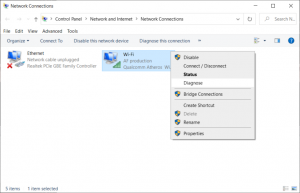
1. Press Windows Key + R then type ncpa.cpl and hit Enter to open Network Connections.


2. Right-click on your current active Wifi connection and select Diagnose.

3. Let the Network Troubleshooter run and it will give you the following error message: DHCP is not enabled for “Wireless Network Connection”.
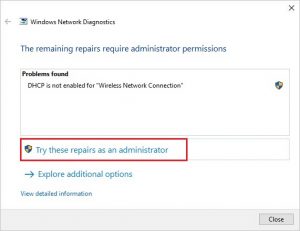

4. Click on “Try these Repairs as an Administrator“.
5. On the next prompt, click Apply this Fix.
If the above didn’t help then run Network Troubleshooter from Windows 10 Settings:
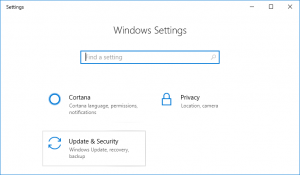
1. Press Windows Key + I to open Settings then click on Update & Security.

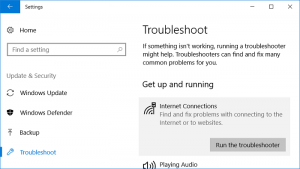
2. From the left-hand menu select Troubleshoot.
3. Under Troubleshoot click on Internet Connections and then click Run the troubleshooter.

4. Follow further on-screen instructions to run the troubleshooter.
5. Reboot your PC to save changes and see if you’re able to fix this site can’t be reached error in Google Chrome.
Method 6: Reset Chrome Flags Settings
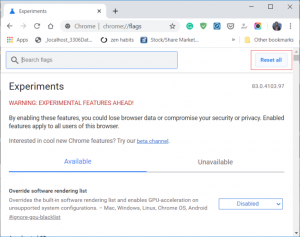
1. Open Google Chrome then type chrome://flags/ in the address bar and hit enter.
2. In the next window proceed with caution and click on the “Reset all” button.

3. Finally, reboot to apply changes and launch Google Chrome.
Method 7: Reinstall your Network driver
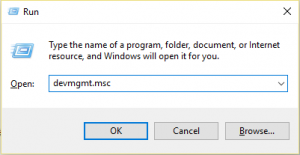
1. Press Windows Key + R then type devmgmt.msc and hit Enter to open Device Manager.

2. Expand Network adapters then right-click on your WiFi adapter and select Uninstall.
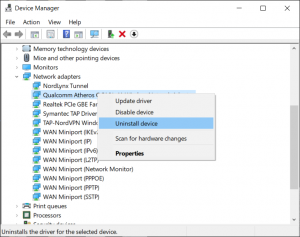

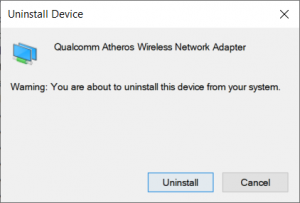
3. Again click Uninstall in order to confirm.

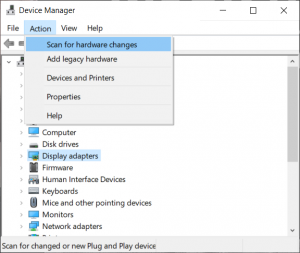
4. From the Device Manager menu, select Action then click on Scan for hardware changes.

5. Reboot your PC and Windows will automatically install the default drivers.
Method 8: Update Wireless Adapter drivers
1. Press Windows Key + R then type devmgmt.msc and hit Enter.


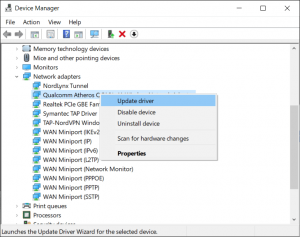
2. Right-click on the wireless adapter under Network Adapters and select Update Driver.

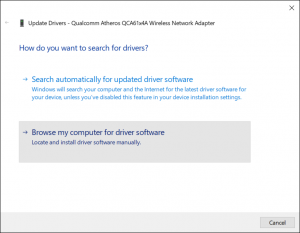
3. Select “Browse my computer for driver software.“

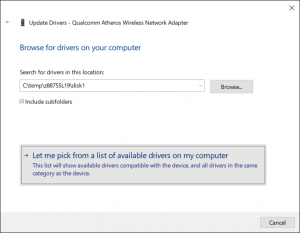
4. Next, click on “Let me pick from a list of available drivers on my computer.“

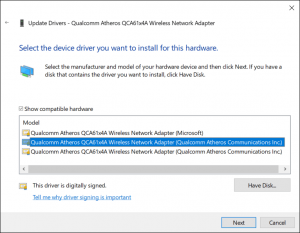
5. Select the latest available driver from the list and click Next.

6. Reboot your PC to save changes and see if you’re able to fix this site can’t be reached Chrome error.
Method 9: Reset Chrome Browser
Note: Make sure you backup your Chrome data before proceeding with the Reset as it will delete all your preferences and data.
To restore Google Chrome to its default settings follow the below steps:
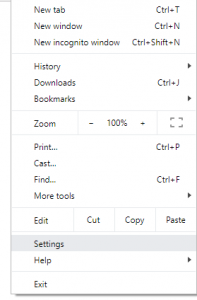
1. Click on three dots icon available at the top right corner.

2. Click on the Settings button from the menu opens up.

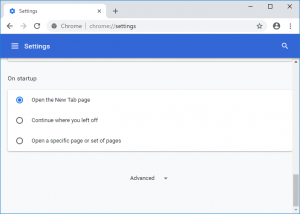
3. Scroll down at the bottom of the Settings page and click Advanced.

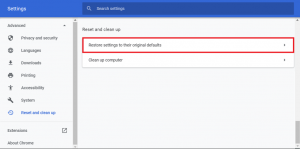
4. As soon as you click on Advanced, from the left-hand side click on “Reset and clean up“.
5. Now under Reset and clean up tab, click on Restore settings to their original defaults.

6. Below dialog box will open up which will give you all the details about what restoring Chrome settings will do.
Note: Before proceeding read the given information carefully as after that it may lead to loss of some important information or data.
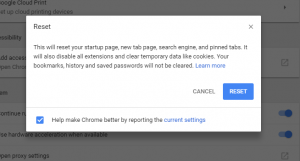

7. After making sure that you want to restore Chrome to its original settings, click on the Reset settings button.
Method 10: Reinstall Chrome
Note: Reinstalling Chrome will delete all your data so make sure you backup your data such as Bookmarks, passwords, settings, etc.
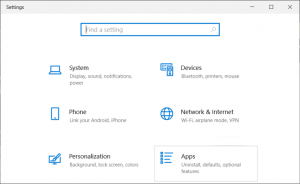
1. Press Windows Key + I to open Settings then click on Apps.

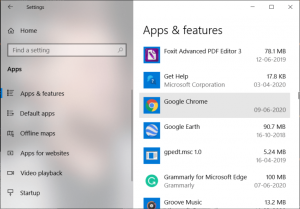
2. From the left-hand menu, select Apps & features.
3. Now under the right-hand side pane, scroll down, and find Google Chrome.

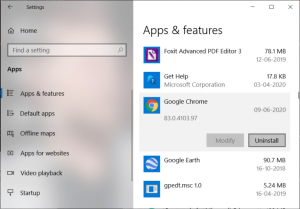
4. Click on Google Chrome then click on the Uninstall button.
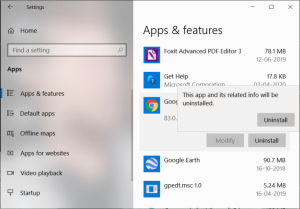
5. Again click on the Uninstall button to confirm Chrome uninstallation.

6. Once Chrome uninstallation completes, reboot your PC to save changes.
7. Again download & install the latest version of Google Chrome.