
Many people use the phrase “Ethernet” interchangeably, but what precisely is it? Look at what are Ethernet cables and how they’re connected in this guide.
What is Ethernet?
Technically, IEEE 802.3 is defined as the protocol for Ethernet. However, saying “Ethernet” is a lot simpler, and it’s most likely how you’ve come to recognize the vital component of the Internet. Ethernet.Ethernet refers to the most widespread form of Local Area Network today for all its technical terms. When it comes to computer networks, LANs (Local Region Networks) are smaller in scope than WANs (Wide Area Networks), covering a broader geographic area.
As you read this, you may even be connected to one.Wireless, on the other hand, is not a feature of Ethernet. It’s reasonable to ask, in this Wi-Fi-centric age, if the rectangular Ethernet connection on your laptop is still relevant. That’s a resounding “yes” from everyone, from serious entrepreneurs to serious gamers, because this is why.
Ethernet: What You Need to Know Before You Get Started
Since the early 1970s, Ethernet has only been capable of transmitting data at a pace of 10 megabits per second (Mbps). Fast Ethernet’s data transmission rates ultimately reached 100 Mbps, while today’s Gigabit Ethernet offers data transfer rates of up to 1,000 Mbps. 10 Gigabit Ethernet, which can reach rates of up to 10,000 megabits per second, is now only available to enterprises on the bleeding edge of technology.
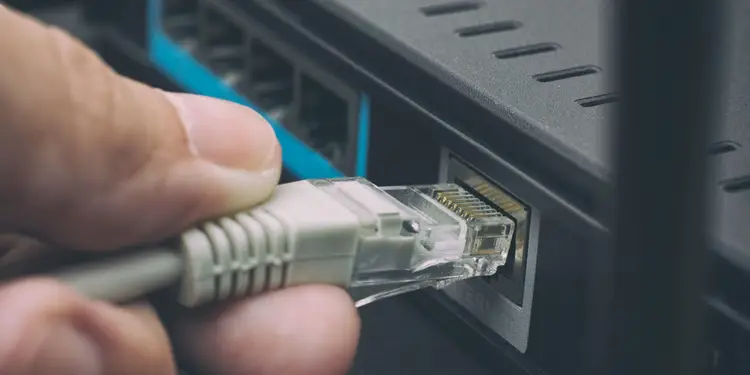
Wire protocols are all about the sort of cable you utilize. The most popular Ethernet cable type is Category 5 (or CAT5). Fast Ethernet is supported, while Gigabit and 10 Gigabit Ethernet is supported through Category 5e (CAT5e) or 6 (CAT6e) connections, respectively. You may be able to utilize a USB-to-Ethernet adapter if your device lacks an Ethernet port.
Setting up a Home Network: A Step-by-Step Guide
If you’re a regular reader of ITProPortal, you’re more than likely to have received a new gadget for Christmas. It may have been an 802.11ac router, NAS, laptop, or iPad Air. When a new piece of gear comes out, it’s a great opportunity to set up or rearrange your home network infrastructure. This is the most frustrating component of using technology for many individuals. Even if you got a new gadget during the holidays, networking is like “some assembly required.”
According to networking hardware manufacturers, setting up your home network is more complicated than just purchasing and putting in a router. However, this does not imply that it must be a nightmare.
1. Setup your Wireless Router
The router connects your home network to the Internet. It is also the way via which all of your network’s gadgets connect with one other. For those who haven’t already done so, our shopping guide to the best wireless router will help you narrow down your options and make an informed decision. 802.11n routers or 802.11ac routers are both available. See: Is it worth buying an 802.11ac router?
Your router must have a network adapter for every device you plan on connecting to it. Your network’s “clients” are the devices on this list. 802.11n adapters will be standard on all new laptops (some will support 802.11ac, even). Compatibility adapters are available for older laptops and desktops. The first step is to connect your router to a modem provided by your Internet service provider (ISP) via an Ethernet connection.
2. Lockdown the Router’s Interface
Step two is to access the router’s web-based interface (some companies call this the management console). When a laptop is connected to the network, a browser can view the interface. Do you have any ideas on how to go about this? The default IP address, administrator account, and password are all included with routers. 192.168.1.1 Is the default IP address for most Cisco/Linksys routers, and the administrator account and password are both set to “admin.”
To connect to the router for setup, you’ll need to adjust the IP settings on your laptop to match the routers. As a result, you may use your laptop to access your router’s configuration software on the go.Connect your laptop’s Ethernet port to the other end of an Ethernet cable connected to the router’s LAN port. Open “Network and Internet” and then “Network and Sharing Center” on a Windows 7 computer connected to the router via Ethernet, for example.
3. Set up Security and IP Addresses
Setting up your network security, including SSID and IP address, comes next after gaining access to the router. To avoid having your capacity and maybe your data stolen by a neighbor, you must implement adequate security measures. Devices on your network interact with the router using their IP addresses; therefore, understanding IP addressing is critical.
The router’s administration interface is where you’ll make all of these adjustments. Typically, these options are found in the “Basic” section of the UI. Other options include “Security” and “Wireless Settings.” After completing these procedures, you should contact the router’s manufacturer if you didn’t locate the configuration settings on the router’s interface pages.
4. Reservation for DHCP
DHCP Reservation is a great practice for individuals who plan to connect servers, NAS devices, or other devices that may be accessed from outside your network. In layman’s terms, it implies notifying the router that a given device will always use a specific IP address that has been “reserved” for it.
My router’s IP address is 192.168.1.1. My email server’s IP address is 192.168.1.2, readily available to me. I may assign 192.168.1.3 to a third device, such as my NAS server, and so on. You don’t want to modify the first three sets of numbers for most home networks. The first three sets of digits, known as “octets,” must be retained to comply with IP addressing requirements.